

As many of you know, one of the biggest innovations introduced in VBR version 10 is the support of NAS backup.
Does this mean that it was not possible to save the unstructured file data before?
Actually not, more than one options were already present.
The scope of the next articles is to show when and how to use those technologies to answer customer needs.
In all the cases the product used is the powerful VBR.
The four main topics are:
- NAS Backup
- File Backup to Tape
- NDMP
- File Backup to Disk
For each of the above-mentioned items, the articles will show:
- How it works
- Common requests and scenarios.
- Technology, Pro & Cons.
Let’s start!
1- NAS Backup
- How does it work?
Veeam mantra is “innovate“! A clear example is represented in the NAS technology.
The primary idea on which this technology is based is to track the changing of the unstructured files.
Let’s clear it up with a comparison: I’m quite sure all VBR users know the CBT (change block tracking) technology strongly used by VBR to create backups of VMs. It allows saving data blocks that have been changed from the previous backup.
The ingenious idea of Veeam R&D is to use this approach when files and folders must be saved.
I called it FCT (File change Tracking).
How does it work?
When a NAS backup is performed, VBR calculates on-fly the CRC (Cyclic redundancy check) of any single file that has to be saved. Those metadata are stored in the cache repository (points three and four of Picture 1).
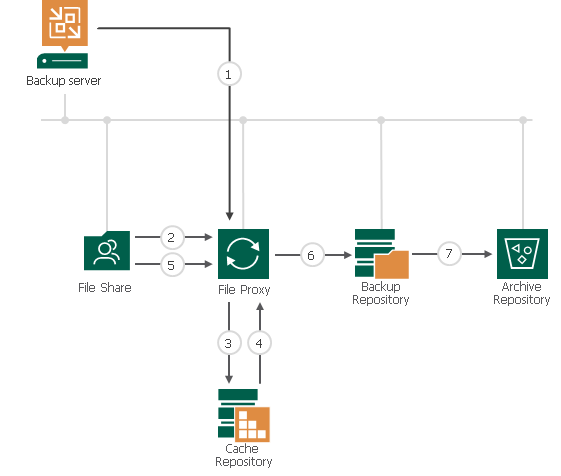 Picture 1
Why is this pre-process so important? Because thx to it it’s possible to:
- Perform incremental backup forever (only new and changed files are saved). It means a shorter backup window.
- Speed up the restore phase; image the scenario where a customer has 5 PB of data and luckily just 1 TB of data has been attacked by a Virus or accidentally deleted by a script.
The IT manager will ask to restore just 1 TB and NOT all PBs.
VBR using the “FCT” can understand which files have been changed /deleted with respect to a specific Restore point and restore just those needed.
This great option is called “rollback to a point in time“.
Just as a reminder, there are two more ways to restore data, Entire file share and single file and folders.
- Common scenarios
NAS backup can be used by any customer. You need just a repository and a valid license (VUL).
The scenario I like to talk about is where the customer has big fillers in his environment.
Why?
Because it is possible to leverage the storage snapshot to gather files as shown in picture 2.
Version 11 will have improvements in this area too. Stay tuned by signing up to Veeam site (https://go.veeam.com/v11).
 Picture 2
Leveraging the storage snapshot a customer can
1. Speed up the backup process.
2. Save files though they are in use (Open files can’t be saved by a backup process while they are processed by users).
This integration allows performing backups to any hour of the working day without any attention to the status of the file.
Main Pro
a -The architecture is very scalable because it leverages the concept of proxy very common to VBR.
Proxies are the data mover that collect data from the source and send them to the Repository. The File Proxy has also the responsibility to calculate the FCT. You can add more proxies when you need to address the backup of big amounts of data.
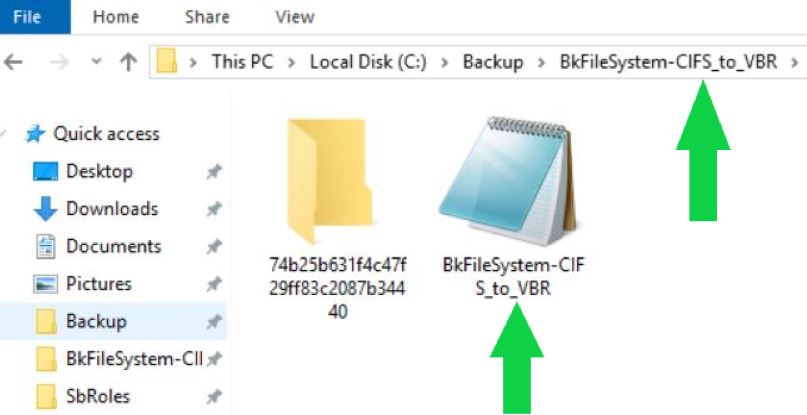
b- The files saved to the Repository are written in a customize format. They are managed as an object in a vBLOB Storage and contain the metadata of every single file saved (they contain info about which folder the file belongs to and which are the file rights also).
Pictures 2 and 4 show the new format of the backup file for NAS.
 Picture 3
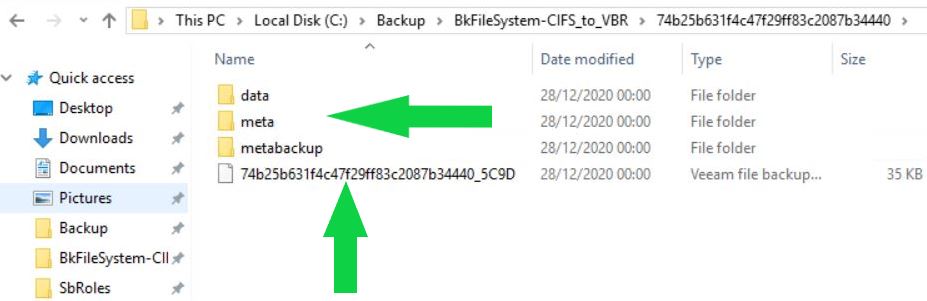 Picture 4
The main advantage is that all file restore tasks are very very fast!
c- It’s possible to copy backup data to the secondary repository setting different retentions. It allows answering the common request to have a copy of backup data in another location (3-2-1 rule).
d- It’s possible to create an archiving backup file policy through the object storage VBR integration. Picture 5 (taken from the VBR user guide) shows the main repositories option available with NAS Backup.
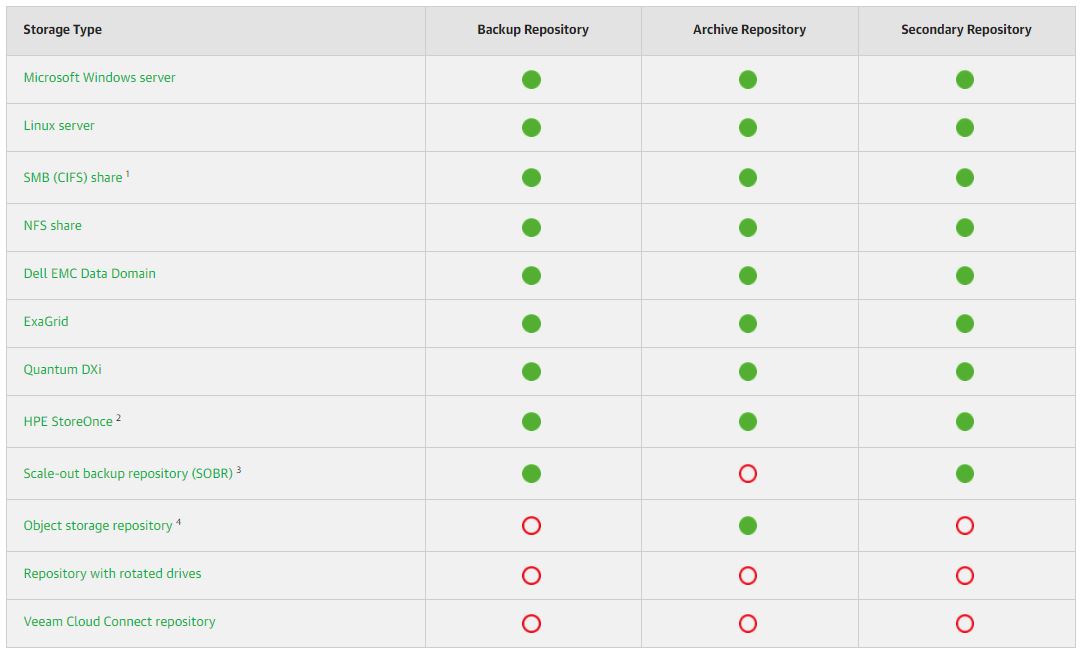 Picture 5
Cons
It doesn’t support the transfer to Tape Devices. Please read the article about NDMP and File to Tape to get an interesting solution.
That’s all for now.
See you in a couple of days for File to Tape Backup
 Picture 1
 Picture 2
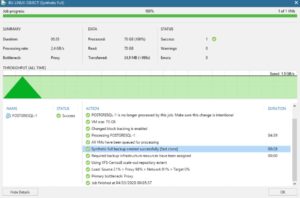 Picture 3
 Picture 1
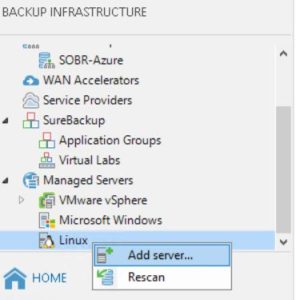 Picture 2
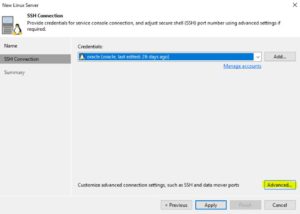 Picture 3
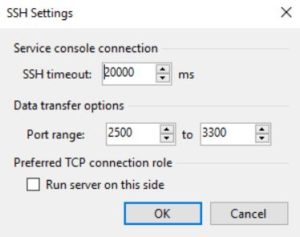 Picture 4
 Picture 5
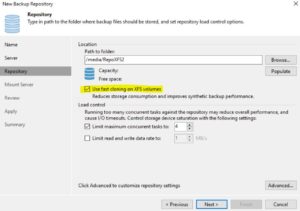 Picture 6